description

Smarter Cookie: a blog for cooking, baking and everything in between...

Search This Blog

Saturday, November 29, 2008

Salt and Pepper Cocoa Shortbread Cookies

I convinced my mom to buy a used edition of Baking: From my Home to Yours by Dorie Greenspan. I've seen so many blog posts about Tuesdays with Dorie, and wondered about some of the recipes that were picked. I'm always drawn to the more unusual recipes and flavors. I'm not sure why but I decide that my first venture into this cook book would be to make Salt and Pepper Cocoa Shortbreads. Then we would really know, if these came out yummy well then this cook book was probably a good investment.


Salt and Pepper Cocoa Shortbread Cookies


1 1/2 cups all purpose flour
1/2 cup unsweetened cocoa powder
2 sticks unsalted butter, at room temperature
2/3 cup confectioners sugar
1 large egg yolk
1/2 tsp fine sea salt
1/4 tsp ground pepper
1 tsp vanilla extract


Mix the flour and cocoa together in a bowl and set aside. With an electric mixer beat the butter until smooth and add in the sugar, continue to beat until they incorporate. Add the yolk, salt, pepper and vanilla, beat until smooth. Add the flour and cocoa mixture in a few separate additions. Mix until combined.

Turn the dough out onto your workspace and divide the dough in half. You want to roll 2 six inch logs, wrap in plastic wrap and place in the refrigerator for 4 hours.

Once the dough has chilled cut the logs into 1/2 inch rounds (you will end up with 24 cookies) bake for 12-15 minutes in a 350 degree until firm. Let them cool a minute on the hot trays before moving to cooling racks.


My dad the official taster here said that he could not taste the pepper in the cookies, he was guessing all over the place, asking if they were brownie cookies, then telling me there was a flavor he could not identify, he ended thinking it was a different kind of chocolate that I used. So in the end they're good, and people will like them. Unusual in name only and the flavors blend to make them a nice chocolate shortbread. Maybe the intent of both the salt and pepper as in many cooking dishes are just to enhance the flavors already there and not make a salt or pepper statement in the cookie.

In the end I can't wait to make another recipe from this cook book. It was a good buy.

Friday, November 28, 2008

Danish Butter Cookies

Yum. These smell and taste so good. They remind me of Pepperidge Farm Chessmen Cookies, which I used to eat by the container because I loved them so much. These sparkle with the sugar on top and are perfect for holiday cookies. They are buttery and sugary and just really good. I found them in Gourmet December 2008 magazine.


Danish Butter Cookies

4 cups all-purpose flour
1 tsp baking soda
4 sticks unsalted butter, at room temperature
3/4 cups granulated sugar
1 large egg beaten
1/2 cup sugar in the raw

I halved the recipe (above is the original) and I got 45 cookies, so unless you are making enough cookies for an army I would recommend halving the recipe and getting a more manageable amount of cookies. As is Gourmet says the recipe will make 9 dozen!

Mix flour and baking soda together in a bowl. Meanwhile beat butter with an electric mixer until light and fluffy. Add the sugar then the flour mixture until combined.

(If you are doing the full 9 dozen cookies) you should split the dough in half and roll out two separate 15 by 10 rectangles. Place the ball of dough between two pieces of plastic wrap and roll out using a rolling pin (I rolled out one.) Place on a baking sheet and put in the refrigerator for about 30 minutes. Once the dough has chilled preheat your oven to 325 degrees and cut the dough into 2 by 1 1/2 inch squares. I used a ruler it just makes the process a lot easier. Reroll out the scraps. These do not spread a lot so you can fit about 8 on a tray at a time.

Brush each cookie with the egg and then sprinkle the tops with the coarse sugar. Bake for 10-15 minutes just until the tops start to get golden from the sugar. Let cool on the trays for a minute before removing to cooling racks.


Serve or pack up to freeze and bring to your holiday festivities.

Monday, November 24, 2008

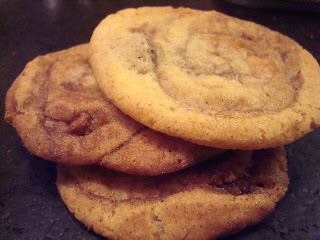
Cinnamon Bun Cookies

I was really excited about this recipe, thought it would take the place of boring old snicker doodles in my holiday baskets. This first attempt did not work out how I imagined. I will be making these again and I will note the changes that I'm planning to make for next time. Everyone loved the flavor of the cookie, and I loved the idea of it, that's why I'm planning to give this one a second shot.


I found other cinnamon bun type cookies but a lot of them had an icing on them. Since I freeze my cookies usually to use later icing does not stay very well frozen. You can always freeze the base cookie and ice them when you want to serve them. I found this recipe from Bake or Break, it seemed great. You do need to make these a day a head and refrigerate the dough, so before you read this and get your hopes up for bringing them into work tomorrow you'll need that extra day.


Cinnamon Bun Cookies

Dough

1 1/4 cups sugar
3/4 cup unsalted butter at room temperature
1 egg
1 tsp vanilla
1 3/4 cups all purpose flour
1 tsp baking soda
1/4 tsp salt

Filling
4 tbsp sugar
2 tbsp chopped pecans
2 tsp cinnamon

Beat the sugar and butter until creamy with an electric mixer. Add the egg and vanilla. In a separate bowl combine the flour baking soda and salt. Gradually add the flour mixture to the butter mixture. Form into a ball, cover with plastic wrap and refrigerate for an hour.


The recipe originally says to roll the dough out on a floured surface into an 18 by 10 rectangle. Next time I do this I'm going to split the dough in half and roll each out until they are about 1/8 inch thick (I'm not sure of the dimensions, you want to make sure its not too thin, but you want it to be a rectangle.) This was because when I made these they spread really thin and a lot bigger than I wanted. So next time if I make them smaller to begin with and roll them a lot tighter they may not spread so much.

Mix the filling ingredients in a small bowl. Sprinkle over the dough and press into the dough. Roll beginning with the long side. Roll tightly. Place the seam side down on plastic wrap, cover and refrigerate over night. In the morning cut into 1/2 inch slices and cook in a 350 degree oven for 9 minutes. Let them sit a minute on the hot pan before transferring to a wire rack to cool.


So my warnings are in there, they might come out big, thin and delicate, but they will be yummy and people will enjoy them. And with my changes I think that these could be a perfect cookie.

Good luck. :)

Wednesday, November 19, 2008

Thai Fish and Noodle Soup

Tuesday night dinners with Ben has become a bit of a substitute for Ben's Poker night with the boys, and I love it (saves him money and gets me a yummy dinner.) I usually look around blogs and Cooking Light to find a recipe that looks good to us. For some reason I've been trying to make a lot of fish on these Tuesday dinners. I saw Thai Fish and Noodle Soup and instantly sent the link to Ben. He was very excited about it and said "yummmm." That was it, we were making Thai Fish and Noodle Soup. I thought the recipe would be so good because it had all the flavors that Ben and I love but instead of a Spanish or Mexican flavoring it was Thai influenced. We love jalapenos, spinach, lime, asparagus and rice. This soup had all that and more.


But...there was something missing. Ben said he wanted a sauce on the noodles which I kind of agreed with, there was not a lot of soup in this soup and since it is made with water it's really thin with not a lot of flavor. It needed that little extra punch of something, I'm not sure what. But it was good for what it was and very filling. I don't know if I would make it again...I want to be clear it was good, just not great it just needed something more to make it great.

Thai Fish and Noodle Soup


1/4 lbs uncooked pad thai rice noodles
4 cups water
3 tbsp fresh lime juice
2 tbsp diced jalapeno
2 tbsp thin sliced lemon grass
2 tbsp fish sauce
2 tbsp minced fresh ginger
1/2 tsp salt
6 cups sliced mushrooms
2 cups julienne red pepper
1 cup asparagus cut into 1 inch slices
1 cup julienne carrot
4 (4 oz) fillets halibut (we used cod since halibut is out of season)
1/8 tsp salt
1/8 tsp pepper
10 cups chopped spinach
1 1/2 cups thin sliced green onions
1/4 cup chopped cilantro

Preheat your broiler and prep you fish, wash and dry the fish spray your pan with Pam and then place the fish on the pan and coat with 1/8 tsps of salt and pepper.

Place the noodles in a bowl and cover with warm water for 3 minutes and drain.

Meanwhile in a medium sauce pan heat the water through the salt in the above ingredients and bring to a boil. Add in the noodles, mushrooms, red pepper, asparagus and carrot, bring back to a boil then let simmer for 7 minutes.

Put the fish in the oven to cook, will take 6 to 7 minutes depending on thickness of fish, it will turn white and flake easily when cooked through.

Stir in spinach, green onion and cilantro into soup, let cook for a minute until the spinach wilts. Ladle and serve one fillet over a cup of soup.


This will make 4 servings (2 cups of soup and 1 fillet per serving.) Ben and I halved the recipe so that it would be enough for just the two of us. We could not finish the soup. There was a lot and the whole dinner was very filling.

We followed the cooking light recipe, we usually make some changes and we did have to use a different kind of fish but for the most part since we are not familiar with Thai cooking and did not want to make changes that would hurt the flavors in the recipe.

Cooking light had the nutrition facts as 338 calories, 4 grams of fat and 32.7 grams of protein. So a great meal all around. I served the soup with a few rolls (I know they're not Thai inspired but there was nothing in whole foods that I thought would work to keep in the Thai theme.) Both Ben and I like to dip our bread in the soup.

This meal defiantly warmed our bellies on a cold Tuesday night.

Tuesday, November 18, 2008

Blondies

I've made this recipe from Smitten Kitchen before. It's so easy that there is no reason not to make these fast yummy blondies for any occasion, special or not. It's one bowl, one measuring cup, and a whisk (well you need a teaspoon measure and a pan to cook them in) but that is nothing when considering to bake something. They come together in 5 minutes and you can add in whatever kind of chips, nuts or flavoring that you enjoy. That means that you could make these 5 different ways and have 5 different blondies to give out.


Blondies

1 sick of butter
1 cup dark brown sugar
1 egg
1 tsp vanilla extract
pinch of salt
1 cup flour
3/4 cup chocolate chips
1/2 cup peanut butter chips


In a medium sized bowl melt the butter and whisk in the sugar, once combined add the vanilla and the egg. Stir until homogeneous. Slowly stir in the flour. Once all combined add in your chips, nuts, dried fruit or whatever else you would like to add.

Pour into a greased pan, and place in a 350 degree oven for 20 to 25 minutes. Let cool for at least an hour before cutting. And serve or freeze.

My only recommendation would be not to add more than one and a half cups of the extras you put in. You do need some dough to keep these brownies and not candy.

Love them, a perfectly yummy and easy recipe to keep in your arsenal.

Apple Cider Cookies for Ben

I was not sure that a recipe for cookies that had pieces of apple and apple cider in them existed. I thought only Ben would want a cookie like that, and it probably didn't exist. After looking through all the blogs I could find yesterday, I found a recipe for Apple Cider cookies and was so excited. I changed the recipe because I did not have the Mulling Spices and thought it was not worth spending a lot of money on whole spices when I might never use them again. I think the cookie was just as good if not better with my changes.


Apple Cider Cookies

1 stick of butter
1/2 cup granulated sugar
1/2 cup dark brown sugar
1 egg yolk
1/2 cup reduced apple cider
1 1/2 tsp vanilla
2 cups diced apples (Fiji)
1 1/2 cups oatmeal
1 cup graham cracker crumbs
1 cup flour
2 tsps cinnamon
1/4 tsp cardamom
1/4 tsp all spice
1/4 tsp cloves
1/4 tsp salt 1/2 tsp baking soda
2 cups sugar in the raw

You need to start off with reducing the the apple cider down, you want to start with 3 cups of apple cider and reduce it to 1/2 a cup all the flavors will intensify and add so much to this recipe. It took me more than an hour to reduce the apple cider, I think the sauce pot I used was too small. You want to bring it up to a boil and then reduce down to a simmer until the cider has reduced.

With an electric mixer cream the butter and the sugars together. In a small bowl whisk the egg yolk, vanilla and the reduced cider together (you want to make sure that the cider is at room temperature or you will cook the egg.) Mix until smooth.


In a large bowl combine the dry ingredients, flour, spices, grahams, oatmeal and apples, stir. Slowly add the dry mixture into the electric mixer with all the other ingredients. Mix until combined. If the mix looks a little wet add in another 1/4 cup of oatmeal (mine was wet and I didn't and when I cooked them they came out a little runny and spread way bigger than I wanted, next time I will add this 1/4 cup of oatmeal.) Refrigerate for 30 to 45 minutes.

Preheat your oven to 350 degrees, spoon the dough into balls 2 tbsp big roll in the raw sugar then place on cooking sheets. Bake for 10 to 12 minutes. My cookies stuck to the pan as well because of the sugar, so next time I wouldn't roll the bottom in sugar so they come up easier off the pan. Let cool on a cooling rack. I came out with a few dozen good cookies and a bunch of broken too soft broken apart too fragile cookies.


Ben loved the taste of these cookies, so next time I make these I will defiantly add in more oatmeal and use less sugar in the raw. I'll update this post when I do make them again and let you know how they come out. I was almost ready to give up on these cookies and do an Apple Cider Cookie: Fail but in reality the flavor was there the structure wasn't and that can hopefully be fixed. They will go on the Thanksgiving cookie platters, even some of the broken, ugly ones will end up hiding on the tray. No one has to know, and honestly if they taste good, the will get eaten. :)

Monday, November 17, 2008

Green Risotto

I used to cook for myself, almost every night, and it was actually how I lost about 15 lbs after college. I ate a lot of risotto, some because I heard it was healthier than eating pasta, but mostly I just came from 4 years of eating pasta almost every night and was tired of it. I decided to revisit that tonight and make myself some yummy risotto, full of veggies.


I popped over to the grocery store to pick up somethings for another recipe you will soon see, and decided to kick up my risotto full of green veggies (it was what I was attracted to in the store.) I'm trying to make smarter choices about food and eating what I want rather than eating dinner and then snacking because dinner was just dinner and not something that I enjoyed.


Green Risotto

1 small onion
1/3 cup risotto rice
1/4 cup white wine
2 cups chicken broth
4 asparagus trees
1 small bunch broccoli
2 cups chopped spinach
4 small mushrooms chopped
1/4 cup parmesan cheese (optional)
1 tsp salt
1 tsp pepper

To prepare the risotto bring the broth to a simmer (to add in later) in a small sauce pan. In a medium sauce pan spay some Pam and add in the diced onion, let them start to cook down about 3 minutes until tender. Add the rice to toast it, about a minute or two. Add in the wine to de-glaze the pan. Cook for 30 seconds or so until absorbed by the rice. Slowly add in the broth 1/2 a cup at a time until all absorbed should be about 25 minutes. Stir frequently.

Once all the broth is absorbed add in the asparagus pieces, broccoli, mushrooms and then the spinach. Stir until the spinach has wilted add the parmesan if you are using it and stir until combined.


Plate and serve. This will make 2 servings. Use it either as a side dish or a main course as I did. Add in whatever veggies you have in your refrigerator or you are craving. This is a great meal that will fill you up and is pretty healthy. Not using oil, cream or a lot of cheese in the risotto keeps the calories and the fat down, adding the veggies keeps you interested.

Sunday, November 16, 2008

Mini Calzones

Let me start off with saying I'm really proud of myself for making these. They are pretty easy to make and if you use store bought pizza dough all you need to do is pick your favorite flavors you want inside cut, fold and bake.


I brought these to Ben's for the usual Sunday night football snacks. I made them miniature so that they were easy to eat while watching the game and each one is about one slice of pizza, for quantity control. I looked up recipes on Cooking Light and followed the directions except used flavors that I knew these boys would love.

Mini Calzones

3 packages refrigerated pizza dough

Feta & Spinach Stuffing
2 cups fresh spinach, chopped
3/4 cup feta
1/2 tsp salt
1/2 tsp pepper
1/4 tsp oregano


Pizza Stuffing

1 cup cheese (pizza blend)
1/3 cup pizza sauce
1/2 tsp crushed red pepper


Herb-Parmesan Stuffing
1 cup greyer cheese
1/3 cup grated parmesan
1/2 tsp salt
1/4 tsp pepper
4 sprigs fresh rosemary
4 sprigs fresh thyme


First you want to mix your stuffing in bowls so that it is ready to go after you have prepared your pizza dough. Please note that if you do want to create your own stuffing they should more solid than liquid, that is why in my pizza stuffing there is a lot more cheese than sauce, this is because when they cook and the cheese melts you do not want all of your stuffing leaking out the tops or the sides.


Roll out your pizza dough. Cut into 4 1/2 inch rounds (I used a small bowl.) Place your stuffing on one half of the circle. Fold over and crimp the edges. Make sure that the edges are really stuck together or else they will pull apart in the oven while baking.


Place on a baking sheet that you have greased (I used Pam.) They will only get about an inch bigger so they can be relatively close together. With a sharp knife cut a small hole in the top of the calzones so they can breath while baking. Spray tops with Pam, so that they turn golden brown. Place in a 425 degree oven for about 10-12 minutes. They should be golden before removing from the oven. With three packages of pizza dough I made 18 mini calzones, there are 6 servings in each pizza dough that I bought, which will make each calzone about 200 calories (depending on your stuffing) and each is equivalent to a slice of pizza so make as many as you need. You could even make them and freeze until you want to serve them.


They look a lot more impressive relatively than how much work they actually are. I loved making these, coming up with the flavors and putting everything together. Everyone loved these. I set some aside for my dad for his dinner and then brought the rest over to Ben's for football snacks. Ben made me pull out a few so that he could have them for lunch the next day before the boys got at them. You can eat them cold or reheat them in the microwave or oven. They are perfect for any meal (you could even put together a bacon and eggs stuffing and have a breakfast calzone!)


This is a really creative and easy meal or snack that you can redo over and over again depending what you have in the refrigerator, or what you are craving for the stuffing. This would be a great way to also get your kids in the kitchen helping with the flavors and folding the dough.

Friday, November 14, 2008

Pumpkin Harvest Cookies

So Ben loves pumpkin, and honestly there are not enough recipes out there for pumpkin cookies. I asked Ben what kind of cookies I should make today and he said Pumpkin or Apple Cider. I have yet to find a cookie recipe with apple cider in it (which I have emailed Gourmet to hopefully find one for me, but if any of you know of one send it my way.) I thought these Pumpkin cookies seemed a little different than just your typical Pumpkin Chocolate Chip which I made a few weeks ago. I found them on Cookie Madness but was a little concerned because Anna never went back to post pictures or comments about these cookies. But I figured the ingredients looked good, and it would be a good addition to my Thanksgiving Cookie Plates.


Pumpkin Harvest Cookies

2 1/4 cup all purpose flour
1 tsp pumpkin pie spice
1/2 tsp baking soda
2 sticks unsalted butter, room temperature
1 1/2 cups dark brown sugar, packed
1 cup canned pumpkin
2 eggs
1 tsp vanilla extract
8 oz white chocolate chips
1 cup chopped toasted pecans

Preheat your oven to 350 degrees. Stir together the flour, spices and baking soda in a medium bowl.


In an electric mixer beat the butter and sugar together. Mix in the eggs (one at a time) and then the pumpkin and the vanilla. Slowly incorporate the dry ingredients until mixed. Add the white chocolate and the pecans. Bake for 8-10 minutes depending on size. The tops should be set and the bottoms starting to brown. This made 14 big cookies and 20 small cookies.

I froze these to put on my holiday cookie trays and they should stay about 3 to 4 months. Later I will be bring one over to Bens for the taste test. Hopefully he loves them!

Thursday, November 13, 2008

Gourmet Favorite Cookies 1940-2008

Wow. My mom found this link and sent it my way, I really can't wait to try and bake a least a few of these if not all.

Wednesday, November 12, 2008

World Peace Cookies

I've made these chocolate short bread cookies before and they are a really good chocolate cookie, pretty easy to make, they are slice and bake so you do have to refrigerate them for a while before baking but you can make them up to 3 days before and then bake them. Will them create world peace, maybe not, but they are really really good.


World Peace Cookies


1 1/4 cups all purpose flour
1/3 cup unsweetened cocoa powder
1/2 tsp baking soda
1 stick plus 3 Tbsps unsalted butter at room temperature
2/3 cup light brown sugar
1/4 cup granulated sugar
1/4 tsp fine sea salt
1 tsp vanilla
5 ounces bitter sweet chocolate chips or mini semisweet chocolate chips

Combine the flour, cocoa, and baking soda in a medium sized bowl. Working with an electric mixture, beat butter until soft add in both sugars, salt, and vanilla, beat for a few more minutes until combined. Slowly add in the flour and mix only until combined. Stir in the chocolate pieces.

Turn the dough out onto a work surface roll into two logs about 1 1/2 inches thick. Wrap in plastic wrap and put in to the refrigerator for at least 3 hours before cutting and baking.

When you are ready to bake preheat the oven to 325. Slice into 1/2 inch thick rounds and place about an inch apart. Mine baked for 9 minutes however the original recipe says 12 minutes just until the cookies are set. Let the cookies sit on the pan for a few minutes before transferring to a cooling rack. Serve at room temperature or freeze until you need them.


This recipe is a good solid, actually better than just good, chocolate cookie, that you should keep as a staple.

Eat them, love them and spread some peace.

Tuesday, November 11, 2008

Crispy Salmon with Spinach Risotto

WOW. So good. This was I think one of the best dinners that Ben and I have ever made. The fact that it was so fabulous and so healthy too is just a huge plus. I was almost speechless to how good this dinner was, so filling and healthy! Yay. I wish I could serve this to anyone who is doubtful that healthy food tastes good. This meal puts all those bad ideas to rest. Healthy food is good food too.


It was really good that I didn't have work today and happened to be watching the Today Show this morning where Jamie Oliver was on and showed how to clean leeks. This was my first experience with leeks and both Ben and I loved them, they added a lot of flavor without being overwhelming. They are from the onion and garlic family of vegetables and have a milder onion flavor. They look like an overgrown chive almost two inches thick. You need to clean between the layers to make sure all of the dirt comes out, cut off the end and the tops of the green leaves. Chop and go. Yum. I can't wait to make something else with them. We found the original recipe here, however like always we add and subtract things.

Spinach Risotto

2 1/2 cups low sodium chicken broth
1/2 tsp olive oil
1 generous cup chopped leek
3/4 cup Arborio rice
1 Tbsp white wine
3 cups chopped spinach
4 mini plum tomatoes chopped
1/8 cup grated parmesan cheese
salt*
pepper*
fresh rosemary*

*All to taste.

Salmon

1 tsp olive oil
2 5 oz fillets of salmon*
salt
pepper
fresh thyme

*10 oz of Salmon is about .65 pounds.


To prepare the risotto bring the broth to a simmer (to add in later) in a small sauce pan. In a medium sauce pan heat the oil over medium to high heat and add in the leeks, let them start to cook down about 3 minutes until tender. Add the rice to toast it, about a minute or two. Add in the wine to de-glaze the pan. Cook for 30 seconds or so until absorbed by the rice. Slowly add in the broth 1/2 a cup at a time until all absorbed should be about 25 minutes. Stir frequently.

Once all the broth is absorbed add in the spinach, tomatoes, cheese, salt, pepper and rosemary. Stir until the spinach has wilted and tomatoes have been brought up to warm. Turn off the heat and plate.

While adding in the broth to the risotto you should start on the Salmon if you want everything finished at the same time. Heat the oil in a pan over medium to high heat. Coat the salmon with the herbs and then place the salmon skin side up and cook until fish has turned to whitish pink, and then flip to the skin side down to finish cooking. Cooking time will depend on the thickness of your fillet. Fish will start to flake when ready.

This made 3 servings of the risotto and 2 servings of the fish. The original nutrition information that came from Cooking Light says 569 calories and 18.8 grams of fat. Since I took out one part of the original recipe (they roasted tomatoes with oil and garlic) and took out the half and half from the risotto. I think that we had a similar amount of calories that the original recipe reads even with the additional risotto. Also most of the fat in this recipe comes from the salmon which is really healthy fat. This meal also had 37 grams of protein which is almost crazy for me.


So you need to make this. That's it, no discussions you make this and you see healthy food is good and filling and makes you feel so good too. You ate something, you're full and tomorrow you're not going to feel like you ate the world, or like your arteries are closing from the fat. You're going to feel good, and when you feel good you're just a better, happier (maybe even lighter) person.

Sunday, November 9, 2008

The Baked Bakery Brownies

I've seen a few reviews for these brownies that are from the Baked Bakery in Red Hook Brooklyn. One said that they are Oprah Winfrey's favorite Brownies. The thing about these brownies is that there is a version that has chipotle powder in them. I wanted to make these spicy brownies, but since they are going for Thanksgiving to houses where there will be kids, I thought that makings these without all the spices would be more widely liked.


The brownies came out fudgy, chocolaty and oh so yummy. The ladies on Food Network always say that adding coffee to chocolate enhances the chocolate flavor. I'm not a lover of coffee but these with espresso powder in them give them that little something extra to separate them from regular brownies. I halved the original recipe. I'll put the original recipe up. However if you do want to halve it use an 8 X 8 inch pan and then half all the ingredients. To get a half an egg crack one and scramble it, either approximate half or 2 Tbsp of egg is about half of one. The original recipe I found here.

The Baked Bakery Brownies


1 1/4 cup all purpose flour
1 tsp salt
2 Tbsp unsweetened cocoa powder
11 oz dark chocolate
1 cup of butter
1 tsp instant espresso powder
1 1/2 cups granulated sugar
1/2 cup light brown sugar, firmly packed
5 eggs
2 tsp vanilla extract

Preheat oven to 350 degrees, grease a 9 X 13 inch pan.

In a medium bowl combine the flour, salt and cocoa powder.

Place the chocolate, butter and espresso powder in a double boiler. If you do not have a double boiler use a saucepan of water simmering and put a heat safe large bowl over the water. Stir until the chocolate has melted fully. Turn off the heat but keep the bowl on top of the water and whisk in the sugars. Stir until combined.

Once the mixture is at room temperature add in three eggs and whisk until incorporated. Add in the final 2 eggs and whisk. Stir in the vanilla. Using a spatula fold in the flour mixture just until combined. Pour the batter into the prepared pan and place in the oven for about 30 minutes until when a toothpick inserted comes out clean with a few crumbs on it. (If halving the recipe mine baked for about 22 minutes.) Let the brownies cool fully before cutting.


Actually putting the brownies in the refrigerator to harden after they are warm to the touch will make cutting them easier. I cut mine into 25 small brownies from the 8 X 8 pan.

Serve and enjoy.

Remember if you are freezing them brownies take a bit longer to defrost. For cookies they will be room temperature in about 2 to 3 hours brownies need at least another hour come up to room temperature from being frozen.


Ben's dad was the taster of these brownies and he said it was good that I only gave him one because he could sit and eat the whole pan they were that good. So make them!

Saturday, November 8, 2008

Double Butterscotch Cookies

Butterscotch brings me back, way back to the steamy days of summer. When my sister and I would pack up our trunks, tie up our sneakers and run screaming out of the house to be dropped off at camp for the next eight weeks. There were a few days (meals) that we all longed for, the congo bars when we had cook outs, the bread sticks on pasta night, grilled cheese and french fries for Monday lunches and the Butterscotch Bars that did not come frequent enough. Now this is a recipe that my sister would love. Her love of butterscotch, and mine, came from these half raw butterscotch brownies, which when they did show up, they made our night fabulous. I've been trying for the past two years, to mimic those flavors and I think this cookie came very close. I left them slightly under baked as the camp cooks did as well, so that the middle of the cookies are gooey. I always change the recipes I find online slightly, but the original recipe I found here.


Double Butterscotch Cookies

1/2 cup unsalted butter, room temperature
1 cup light brown sugar
1 cup dark brown sugar
2 eggs
1/2 Tbsp vanilla
3 cups all propose flour
1 1/2 tsp baking soda
1 1/2 tsp cream of tartar
1/2 tsp salt
3/4 cup toffee bits (Heath Bar bits)
3/4 cup chopped pecans, toasted

Preheat your oven to 350 degrees.

In a mixing bowl beat the butter and the sugar until they come together. Add in one egg at a time and mix well after each addition. Add in the vanilla and mix until combine.

In a medium bowl mix the flour, baking soda, salt and cream of tartar. Gradually add the flour mixture to the mixing bowl with the butter, sugar and eggs. Do not over beat, mix just until combined then stir in the toffee bits and the pecans.

Scoop and drop these onto your baking sheets. Bake for 8 minute until the edges and top are light brown. Let sit on the baking sheets for 2 minutes before removing. If you wait too long the bits of toffee that melted during the baking will start to harden to the sheet making it more difficult to take up.

I made 15 big cookies and 10 medium size cookies.


These are going as part of holiday and Thanksgiving cookie packages that I will put together. As you've noticed I've made a lot of cookies recently. This is because I am anticipating that I will be moving December 1st and therefore will have little time in the next few weeks to bake. Cookies freeze so well. Up to 3 or 4 months they will keep in a plastic container frozen.

Friday, November 7, 2008

Peanut Butter Chocolate Chip Cookies with Pretzels and Kosher Salt

Yeah, it's a mouthful of a name, but I'm not sure how else to title these chock full of stuff cookies. I was so excited when I saw this recipe this morning on a blog that I regularly follow. So excited that I needed to run downstairs and try these out. Who doesn't like pretzels, chocolate and peanut butter? Everyone. So one cookie that has it all. Amazing. Topping this cookie with Kosher salt put it over the top for me, made me need to make them today.


The original post can be found here. However I made some minor changes as I always do to recipes, to make it better in my eyes. My version is below, but check out the original too and if you try this recipe add the things that you know and love too.

Peanut Butter Chocolate Chip Pretzel Cookies

2 1/2 cups all-purpose flour
1 tsp baking powder
1/2 tsp baking soda
1/2 tsp salt
1 cup butter, at room temperature
1 cup packed dark brown sugar
1 cup granulated sugar
1 generous tsp vanilla extract
2 large eggs
1 cup chunky peanut butter (I used JIF Chunky)
1 cup salted pretzel pieces (I used Rold Gold)
1 cup chocolate chips semi-sweet
kosher salt for toppings

Mix the flour salt, baking soda and baking powder in a bowl and set aside. Beat the butter and sugars in a bowl with an electric mixer until light and fluffy. Add in the eggs and the vanilla. Make sure the first egg is incorporated before adding the second. Mix in the peanut butter and then once incorporated slowly add in the flour until just mixed. Add in the pretzel pieces and let the mixer go for a minute. This will crush any pieces that are too big. Then add in the chocolate chips.


Scoop onto baking sheets, flatten slightly with your fingers and sprinkle a pinch of kosher salt on top. Place in a 350 degree oven for 10 to 13 minutes. I came out with 15 big ones (2 tbsps) and 24 small ones (1 generous tbsp) from this recipe.

Now the reviews of this cookie aren't fully in yet. I will update as they pour in, however my Dad liked that they were so interesting and had a lot going on. One strange this was that he didn't know that they were peanut butter cookies, which baffles my mind, because they are peanut butter cookies. I think he was so distracted by the salt on top that he couldn't taste anything else in the cookie.


Ben will be the real test to see if these cookies are good. He is a lover of salt openly and I think a secret lover of sweets. One of his favorite treats are chocolate covered pretzels so I'm going to just take a guess at this and say that he will love them. The first thing that Ben said was that he tasted the peanut butter and that they weren't too salty for him. I'm a little concerned that without explination as to what these cookies are supposed to be, people are just going to think I made super salty cookies, which isn't the intent. So I'm not sure on these...mixed reviews. They will go in my holiday packages and hopefully people will understand these wild cookies.

Thursday, November 6, 2008

Italian White Bean and Spinach Soup

Yumm-O as Rachel Ray would say. This soup was beyond good, it was well balanced, flavorful and healthy. I found this recipe on Cooking Light and modified it slightly for our tastes. It was the perfect dinner for a rainy thursday night.


Italian White Bean and Spinach Soup

10 button mushrooms sliced
2 Tbsp Olive Oil
2 small yellow onions diced
5 cups chopped fresh spinach
1 tsp fresh rosemary chopped
1 tsp fresh thyme chopped
1/2 tsp fresh ground black pepper
1/4 tsp salt
1 16 oz can Cannellini Beans drained and rinsed
2 14 oz cans chicken broth
crushed red peppers to taste

Heat oil in a medium sized pot add the onions and mushrooms and let simmer until tender. Add the spinach, rosemary, thyme, black pepper, beans and broth to the onions and mushrooms let come up to a boil and then reduce to a simmer for 10 minutes. Shake on a few crushed red peppers to the top of your soup bowl.

Serve with a hunk of crispy bread.

Ben and I absolutely loved this meal. Usually I get concerned about dinner that does not have meat in it for Ben, if it is enough food, if he'll be hungry in 10 minutes, but because of the mushrooms and the beans in this soup it had body, it was thick and filling.


I'm almost positive Ben and I will be making this again. So easy, so yummy and so healthy. (Cooking light nutrition facts list their version as 78 calories 2 grams fat for 1 cup.)

Tuesday, November 4, 2008

WOW Oatmeal Raisin Cookies

"Love it." Was the official quote from my father, now I'm not sure I've ever ever heard this from him. There is usually some comment attached, "Really good, but..." I almost can't believe how good these cookies are. They are the best oatmeal raisin cookies I've ever made. You need to make these. You will wow everyone. It's an exciting day when you print out a new recipe and it becomes the new standard because it is just so damn good. This cookie is amazing.


Oatmeal Raisin Cookies


3 Large Eggs
1 generous tsp vanilla extract
1 cup raisins
1 cup butter
1 cup dark brown sugar
1 cup granulated sugar
2 1/2 cups all-purpose flour
1 tsp salt
2 tsp baking soda
1 generous tsp cinnamon
2 cups quick cooking oats
1 cup toasted walnuts

In a bowl combine the eggs, vanilla and raisins. Let sit for about an hour. (I only let mine sit for about 40 minutes.) You can just do this as the first step and then start on with everything else and by the time you need the raisins it will be about 30 minutes.

Beat the butter (room temperature) and the sugars until homogeneous. Mix the flour, salt, baking soda and cinnamon together, well. Slowly add this mixture to the butter and sugar. The dough will be dry at this point. Add in the egg, raisins and vanilla and mix, then add in the oats and the toasted walnuts.

Scoop onto cookie sheets and bake for about 10 to 13 minutes at 350 degrees. They cookies will turn very golden brown. Let them cool a minute on the tray and then move to a cooling rack. I made 15 big cookies and 15 medium cookies. It may be around 40 medium cookies total.

I found the original recipe here, I did make a few changes in that I never use shortening, which is what the original calls for. You can substitute butter for it at the same amount.


Please, please make these, they are just so good.

Sunday, November 2, 2008

The Great Chocolate Chip Cookie Debate

Which Chocolate Chip Cookie is the best?

For my birthday I got the answer. I made three different chocolate chip cookies to bring into work. I have three go to recipes and they are very different in both ingredients and flavor. Cookie B won (by email vote.) And by popular demand from my co-workers here is the winning recipe.


Chocolate Chip Cookies

1 cup pecan pieces
15 Tbsp unsalted butter at room temperature
1/4 tsp iodized salt
2 3/4 cups all-purpose flour
1 1/4 tsp kosher salt*
3/4 tsp baking soda
3/4 cup granulated sugar
3/4 cup packed light brown sugar
1 large egg plus 2 yolks
1 Tbsp vanilla extract
1 1/2 cups semisweet chocolate chips

*The recipe calls for Diamond Crystal Kosher Salt, I used this because it is the brand that I have, please make sure no matter what brand you use that you are using kosher salt and not iodized or sea salts.

Preheat oven to 350 degrees.

On a cookie sheet (if you are using an oven) or on tin foil (if you are using a toaster oven) place the pecan pieces in a single layer and toast. This will take about 8 to 10 minutes, do not let them burn. The pecans will start to smell when they are ready. Transfer the nuts to a small bowl add 1 Tbsp of the butter and the iodized salt and toss to coat. Set aside to let the nuts cool.

In a medium bowl combine flour, kosher salt and baking soda. In a bowl with an electric mixed beat the rest of the butter (14 Tbsp) with the granulated sugar and the brown sugar. Mix until combined. Add the eggs and the vanilla. Slowly add the flour mixture until just combined. Stir in the chocolate chips and the pecans.

Scoop onto baking sheets and cook for about 12 minutes. I used two different scoops and got about 15 bigger (2 Tbsp) cookies and 15 smaller (1 generous Tbsp.) Bake until just golden on the bottoms and sides. Let cool on the tray for 2 minutes and transfer to wire racks.

I found this recipe in the Boston Globe Food Section 10/2007.


There you go. The (almost) unanimous wining Chocolate Chip Cookie.

Hope all your co-workers like them too. The next taste test that I'm going to bring into work is the Ultimate Brownie, stay tuned for that. :)