description

Smarter Cookie: a blog for cooking, baking and everything in between...

Search This Blog

Monday, April 28, 2008

Banana Nut Muffins

Three ripe bananas on the last day of passover. It may not have been quite ok to go ahead and do some baking yet, but I decided that I needed to get my hands dirty in a little baking finally.


Three spotted brown bananas plus a boyfriend who loves banana bread but is trying to start eating better, equals Banana Nut Muffins. This way the potion size in controlled unlike the usually large slices that are taken from a loaf.


I used the same recipe that I do for making banana bread and just put them in a muffin tin, with liners of course. This cut the baking time from just about an hour to 25-28 minutes, and clean up was a snap. I under filled the muffins (getting 22 muffins, therefore Ben gets 2 for breakfast,) and would next time make them twice as big I think, fill them all the way to the top of the liner and do the recipe the original way.


This banana bread recipe spans my family, my mom, aunts, and I all use it, but we all do it a little differently. The original recipe stays to split the eggs add in the yolks first to the batter then at the last step, after the vanilla fold in beaten whites. This will add lift and a lightness to the bread. I have never done the recipe this way, my mom has done it both and my aunt swears by splitting the eggs up. For a muffin I think that puff and lightness may be needed to bring these Banana Nut Muffins to the top of the list.

There will always be another three ripe bananas, and therefore there will be another chance to take on these muffins.


*I only used a 1/2 cup of chopped walnuts, 1/4 cup into the batter and the rest sprinkled on top of the muffins.

Friday, April 25, 2008

Veggies on the Grill!

Only three more days of Passover, wo wo! It will officially end Sunday at sun down, we'll see if I can hold out that long. But as of today I'm still going strong.

It is still beautiful here in Boston, getting into the mid 70s almost every day this week, alas the meteorologists say it will come to an end tomorrow, and thrust us back into the mid 50s and rainy Spring we all know. So we must grill these last few nice days to take advantage of the sun and the warmth. And grilling doesn't involve any of those forbidden foods. Chicken for me and a steak for Ben. The real prize of this meal though were the veggies we did along with the meat on the grill.


On a sad side note, Ben and I both love grilled corn, and he had some prepped and ready in the fridge, but Passover, if only it wasn't passover. So tempting, but we didn't. We decided to grill up some asparagus and mushrooms. This was my first attempt at doing mushrooms on the grill, they turned out fabulous, and really added to this meal.

Grilled Mushrooms

10 Mushrooms whole
1 tbsp extra light olive oil
salt
pepper

Asparagus

12 Asparagus
1 Lemon
salt
pepper


Clean the mushrooms with a damp towel. I forget why but you're not supposed to run them under water to wash them, but just don't do it :). Coat the mushrooms in the olive oil and salt and pepper and then place on the grill, turn after 4-5 minutes, this will depend on the type and therefor size of your mushrooms. Ben and I always taste our food before taking it off, this is just a good way to know if its done the way you like it. Allow to cook for an additional 3 to 4 minutes, and plate.


Trim and wash Asparagus, squeeze the lemon juice over the asparagus and coat in salt and pepper. Place on grill turn after a couple minutes so that you have grill marks on all sides of the asparagus. (This is a big harder than you think it is and a little frustrating, just do the best you can to rotate them.) Let cook another couple minutes on the grill and plate.


I would recommend that you put your meat on the grill first to get it started so that everything is done at the same time. You don't want your veggies to get cold waiting for the meat to be done.

Tuesday, April 22, 2008

Breakfast for Dinner?

So it's Passover, 8 days of no bread, or more specifically oats, wheat, barley, rice, corn, soy, legumes, and basically everything else that's good. I'm a bit on the strict side when it comes to keeping passover, and not eating any of those foods or anything derived from those foods, including peanut butter and corn syrup. Yeah it's a difficult 8 days.

So besides being overwhelmed with family and helping my mom host the Seders I am sick. Very sick all weekend long. After a lot of matzo ball soup today I am finally feeling better, slightly. So I wanted to make some dinner for Ben and I, something easy and nice to say thank for him taking care of me the last few days. I decided since we were unable to have a Sunday Breakfast this week, that we would do Breakfast for Dinner tonight.


Omelets and Hash Browns it is. Since my hash browns are always mushy I went to a fellow blogger for help. I need to make sure that the potatoes are as dry as possible before cooking them.


This was my experiment in finally hopefully making crispy harsh browns and therefore making Ben fall in love with me for ever and ever. Or something like that...

My Omelet

4 Egg whites
1/2 red pepper chopped
5 or 6 chopped mushrooms
1 oz 50% reduced fat Cheddar Cheese

Ben's Omelet
3 Whole Eggs
1/2 red pepper chopped
5 or 6 chopped Mushrooms
1 small yellow Onion
1.5-2 oz reduced fat Cheddar Cheese


In a pan coated with Pam, sautee down the pepper, mushrooms and onions, for about 3 to 4 minutes until they have reduced over medium heat. They should not be mushy, but nicely cooked, add in scrambled eggs and let cook. Make sure you have a nicely grease pan or else your omelet will get stuck, flip if you can. If not cook on medium low heat until the bottom is browned and the top is cooked add in cheese and fold over in classic omelet style.

Hash Browns
2 small cooking potatoes
salt
pepper
1 Tbs olive oil


Grate the potatoes and get off as much liquid as you can before placing in satuee pan. Add salt and pepper, place in a sautee pan over medium to high heat that is coated with olive oil, make sure that the potatoes are not too thick in any place. Once in pan do not move until browned on one side. Then flip, let cook until brown again, serve and eat.


I also served a bit of matzah with this meal, to replace the bread, but it did no justice. The meal was great, but I needed a peice of toast. We also had a little trouble flipping our omelets, since I don't have huge sautee pans the omelets were a little on the thick side and needed to be flipped so we didn't get one of those diseases from eat raw food. It ended up a bit messier that I had anticipated, but turned out to be great. We sat outside on the summer like night and enjoyed our breakfasts for dinner together.

Wednesday, April 16, 2008

Oatmeal Peanut Butter Chocolate Chip Cookies

It's a mouthful. Literally, of sweet, salty, oatmealy goodness.


Lately I've been seeing a lot of different peanut butter cookie recipes that include cinnamon in them. I'm not sure if this was a secret ingredient in some bakers arsenal of cookies, but I just found out about it, and needed to try it. These cookies mix three different favorites all together and come out with the perfect balance of flavors. "Really good," everyone said.


Oatmeal Peanut Butter Chocolate Chip Cookies

3 cups Old-Fashioned Oats
1 cup All-purpose Flour
1 tsp Baking Soda
2 tsp Ground Cinnamon
¼ tsp Ground Nutmeg
¼ tsp salt
2 sticks unsalted butter, at room temperature
1 cup peanut butter*
1 cup granulated sugar
1 cup light brown sugar, packed
2 extra large eggs
1 tsp vanilla extract
9 oz bittersweet chocolate chips

*I used reduced fat smooth peanut butter, it worked fine, it was just what I had on hand. Smooth, chunky, reduced fat or not, I'm not sure it matters either way.


The original recipe called for fresh grated nutmeg, but I didn't have that, so I substituted ground, also it called for bittersweet chocolate chunks. I would have rather used chunks I think, but my grocery store only had bittersweet chips and I wasn't about to chop the chocolate. I'm too lazy for that. The original recipe can be found here.

Preheat oven to 350°F. In a medium bowl, whisk together oats, flour, baking soda, spices and salt. Set aside.


In a large bowl, beat butter, peanut butter, sugar and brown sugar on medium speed until smooth and creamy. Add the eggs one at a time,waiting until each in incorporated before adding the other, then beat in the vanilla. Reduce mixer speed to low and gradually add dry ingredients, mixing just until blended. Add the in chocolate, stir to combine.


Drop onto cookie sheet in balls, do not flatten, they will spread a bit, leave about 2 inches between cookies. Bake about 15 minutes until edges are golden. Take out of oven leave on cookie sheet for 2 minutes to cool and harden before putting on the cooling rack. Repeat until all dough is used up. These will stay good for a few days on the counter or a few months in a plastic container in the freezer.


I took these to work as a treat for my co-workers. I try and bring in something once in a while, just as a little surprise. Everyone was excited for the new recipe, and I even got a request for a copy of the recipe right after trying them. They are a different take on classic cookie flavors. I will defiantly be making these again. They were a winner according to everyone.

Tuesday, April 15, 2008

Mac & Cheese Rice

Still no vegetables at Ben's house, yes I know we're both a little lazy and forgetful. So what? Ok well a side dish is needed for dinner, and I'm feeling adventurous. There's rice and pasta. After eating my way through thousands of pounds of pasta, every dinner, literally through college, I'm still shying away from it. So I go for the Uncle Ben's plain white rice and think, ok lets dress this rice up and make it into something.


So Ben loves Mac & Cheese, and I'm all for it, but I find it a little rich, and heavy, and I'm not sure it's on my top 100 list of best things to eat, but risotto is defiantly on that list. We unfortunately did not have any high quality risotto, and had to use plain white rice, it didn't affect the dish, and I think it came out quite good.

Mac & Cheese Rice


2 Cups white (cooked according to package)
4 oz White Cheddar Cheese*
1/8 cup Shaved Parmesan Cheese
2 tsp salt
2 tsp pepper
2 tsp dried Sweet Basil
10-12 shakes chili pepper hot sauce**

*We used Cabot's 75% reduced fat cheddar cheese, it does melt, and is ok for this dish. I wouldn't recommend eating it alone, it kind of tastes like wax. I like the 50% reduced fat and would have used it for this dish if we had it.

**Ben bough a huge thing of all different kinds of hot sauce, but you can use whatever you have on hand. I would say taste it after a couple shakes, and put in as much as you like, we both like things with a kick.


Cook rice according to the directions. Once fully cooked through add in the spices and the cheese, and stir over low low heat until fully melted, the reduced fat cheese will take a bit longer to melt since it's part fake. Add in the Parmesan cheese as well and mix through. Shake in as much or as little hot sauce as you want, taste, and adjust seasonings as needed, and serve.


This was an easy peasy side dish, that turned out to be simple and yummy. I would defiantly make it again in a pinch.

Monday, April 14, 2008

French Toast with Pecan Banana Syrup

It was time for something different. A sweet Sunday morning breakfast for Ben, no more eggs and potatoes. He might not have been bored of it yet, but I was. I needed something...well great, and I needed to have some creativity in the kitchen. This came out great, but not fabulous. There are many reasons for that. All of which I will address. This became more of an experiment in making syrup than anything else.

French Toast! I thought, it's been forever since I've made that for Ben, I had the bread, eggs, everything I needed, so this seemed like a perfect idea. Now I went to the grocery store I think 2 or 3 times after I had come up with this idea. (I love going grocery shopping.) None of those times I ever thought to buy syrup. Well I did actually think about it and decided against spending 8 or so dollars on an entire bottle of syrup for one single breakfast and besides my roommates would end up using it. Now, I'm all for sharing, but between the beer and everything else they "borrow" I thought against it. It seemed a waste of money, and usually one of my roommates does have some syrup in the refrigerator so I thought borrowing a squeeze or two they might not notice. I did however notice the bottles of Jack Daniels and vodka that "disappeared."


Ok back to the french toast. Sunday, morning, well afternoon, I went downstairs to make breakfast, got the bread out, made the egg soak, and started looking in the refrigerator to find the syrup. NO SYRUP, Ahh. Whats french toast without syrup, its just disappointing. So I vaguely remembered watching a Paula Dean episode where she makes the syrup that goes on some tragically buttery breakfast. Alright, lets experiment. First the recipes:

Best French Toast


2 1/2 pieces white bread*
2 Extra large Eggs
2 tbsp milk
1 tsp vanilla extract
1 tsp cinnamon


*Challah is the best bread to use for french toast, but in a pinch you can use anything even french bread or plain white as I did.


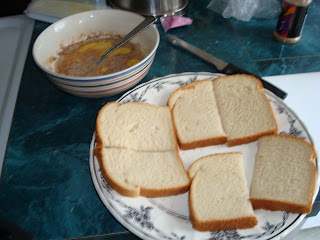
I cut the bread so that they would fit better in my smallish size pan but either way works. I didn't want to be cleaning every pan in the house after breakfast. The key to making a good Sunday morning breakfast is to get greatness and little clean up. Combine Eggs, milk, vanilla and cinnamon in a bowl, add the bread to the egg wash and let soak for a few seconds on each side. Do not leave in the egg was for too long, especially with thinner slices of break, the liquid will start to break down the break and it will just be mush. Place in pan that have either butter or Pam in the bottom, and let cook over medium heat. Flip only once, it will need maybe 4 or 5 minutes on each side, but this also highly depends on the thickness of your bread.

Plate and cover in syrup. Dust with powdered sugar for a professional look.


Ok my syrup was almost like caramel, and this is the only fault that Ben found with the dish. By the end the thickness of the syrup was too much, he loved the taste of it, so therefore managed to clear the plate, but did comment that it was on the thick side.

Pecan Banana Syrup


4 tbsp butter
1/2 cup brown sugar
1/4 cup honey
1/4 whole pecans
1/2 banana sliced


Melt the butter in a small sauce pan over medium heat, add in the brown sugar and the honey. Stir to combine, let the sauce start to bubble up, this will start to thicken the syrup, take off heat, because you do not want it to burn add in the pecans put back over low heat and let warm. Start slicing in the banana and let sit in syrup for just a few seconds to let warm through. Top on french toast and serve.

It was great, but not amazing, maybe I put too much syrup on the plate when serving? Oh well it was a crisis averted, and a successful experiment.

Friday, April 11, 2008

The Case of the Rotten Vegetables & The First Grill

FINALLY. It's warm enough to grill out. I have been waiting for this day, the first summer like day in Boston for a while. I love to (have Ben) grill us food. We were both feeling a little lazy as it is getting to the end of the week, and decided that we would just grill whatever was in the kitchen and not go out to the store. This turned out to be a tragic story of the case of the rotten vegetables.

What do we do with: brown baby carrots, mushy "fresh" spinach, soft and wrinkly peppers (green and red), brown "white" mushrooms, a green "purple" onion, soft potatoes (both red and Idaho) and white frozen green beans? Well you throw it all away. But what did it leave us with...not much. So we did find a medium size yellow onion and actual white mushrooms. I decided not to put these on the grill, to just let Ben grill up some chicken breasts for us and a couple of hot dogs for him. This did leave Ben with a very empty kitchen, so going shopping for fresh veggies will happen in the near future. Good thing it was trash night!


I sauteed down the mushrooms and onions in a pan together over medium to high heat and made a loverly side dish to our grilled food. Ben also said that if we added in a green pepper and grilled some sausages this would be the perfect Fenway replica of the Sausage Guy's offerings.

Mushrooms and Onions


1 medium size Yellow onion
7 or 8 White mushrooms
1 tsp salt
1 tsp pepper
2 tsp dried garlic powder

Pam a sautee pan and let it warm to medium to high heat. While the pan is warming slice mushrooms and dice onion. Add the mushrooms to the pan and let start cooking down for a minute or two, then add in the onions and just let cook down, they will start to sweat and let out their juices, then add in the salt, pepper and garlic powder. Continue to sautee until onions are starting to brown and are fully soft and mushrooms have reduced their size by half. Plate, top or just devour this really easy side dish to any meal.


Grilled Chicken

2 Boneless skinless Chicken Breasts
seasonings


I love my grilled chicken with just some salt, pepper and red pepper flakes. Ben loves those premixed seasoning that you can pick up in any grocery store. Tonight he used a "char-grill" mix while I did the traditional seasonings (see above.) I don't want to over power the taste of the grill, and therefore like to keep the seasonings on the lighter side. This chicken was just as I love it, a little crunch on the outside and juicy in the middle. My boyfriend is the master of the grill.


Next time we may take a trip to the store to pick up some other vegetables, but the dinner miraculously worked out. Between the smell of the grill and the mushrooms and onions it smelled like a Saturday afternoon and the ballpark.

Thursday, April 10, 2008

The BEST Brownies. Period.

So here it goes, after tons of coaxing from my sister who is a avid lover of these brownies. Here is my secret. The best brownies ever. They are fairly easy to make and even easier to eat. They are fudgy, yummy, and just lovely brownies. Make these and you will be loved by anyone and everyone that eats them. I do have to appologize I do not now have a picture of these at final product stage, they vanished before a picture could be taken.


I think that these brownies were the first thing that I ever made on my own in my mom's kitchen growing up. Just one Saturday or Sunday afternoon that changed the lives of my family, friends, and all those around me after. These are the best brownies ever, tested, tried and true.

Fudgy Fudgy BEST Brownies
6 oz unsweetened chocolate
1 cup salted butter
4 extra large Eggs
2 cups granulated sugar
1 1/2 tbsp Vanilla extract
1/2 cup all-purpose Flour

In a small sauce pan melt the butter and chocolate together over low heat. (This can also be done in the microwave, but only if I'm feeling really lazy one day. For some reason I think the butter and chocolate melt better together on the stove.) You may need to constantly stir this to make sure that the chocolate is not burning and that everything is melting. Take off the heat immediately when everything is melted. Meanwhile beat eggs on medium until light yellow in color. This is the only leavening in the brownies, so you do want them light, but if you over beat the eggs the brownies will not come out successful. The top will rise and then sink like a bad soufflé out of the oven, so really only beat for 5 minutes. Add sugar and mix until combined. Add butter and chocolate mixture once it has cooled a bit also add in the vanilla at this time. Then add it the flour and just mix until combined.


Then add in 6-8 oz chocolate chips, walnuts or both! Save some to sprinkle on top.


Place in a 8 by 8 greased pan in an 325 degree oven for 60 minutes. You should watch becasue each oven is different, but I have rarely taken these out before 65-70 minutes. You will need a toothpick inserted to have small crumbs on it when its ready to come out. Do not over bake or under bake, they should not be liquid.


I have tried to use foil in the pan, but becasue of the nature of the fudginess of these they will break apart if you try and lift them all out at once with the foil. Just make sure that you really grease the bottom and corners of the pan well.

All the credit of these BEST brownies goes to Mrs. Fields. You can see her original recipe here. I usually make these plain, but my dad loves them with nuts. I also don't think that the chocolate chips add anything to these, only a little longer baking time. Plain may be done around 55 minutes. So watch.


Place in your refrigerator for an hour before cutting, you need that to help solidify the brownies. Cut and serve, you can also freeze these for up to 3 months, but trust me they wont last that long. Also if you need more than like 24 brownies, just double the recipe and use a 9x13 pan.

As you can see from the pictures this was the time I tried to make it with the foil, becasue I have had trouble with the brownies sticking to the bottom, but I don not recommend doing it. They came out fine to pass out to my family and roommates, but not necessarily to go on display it a museum or something. So don't use foil.

Wednesday, April 9, 2008

Spicy Honey Brushed Chicken Breasts

Chicken. Ok, but what kind of chicken do you want to make? I'm not sure either. Is it warm enough to grill yet? No. Ok. Let's find something good. Ok.


So while looking through both food network and cooking light's websites we thought about indoor grilled chicken, which just seemed wimpy compared to a real grill outside, chicken tenders, sauteed chicken...hmmm no I wanted something fun, wild even. Something new and experimental.


Thats when I found this recipe, it looked very good, and pretty easy. A side of broccilini steamed and we'd be all set for a great dinner. I did change the recipe slightly, so see below.

Spicy Honey Brushed Chicken Breasts


2 tsp chili powder
1 tsp salt
1 tsp ground cumin
1 tsp paprika
1/2 tsp red pepper flakes
4 skinless, boneless chicken breasts
Cooking spray
3 tablespoons honey
1 teaspoons apple cider vinegar

Preheat broiler.

Combine first 5 ingredients in a large bowl. Add chicken to bowl; toss to coat. Place chicken on a broiler pan coated with cooking spray, next time I would put foil down becasue our pan became really messy from the juices and the spices. Broil chicken 5 minutes on each side. They will be cooked through, do not worry.


Combine honey and vinegar in a small bowl, stirring well. Remove chicken from oven; brush cup honey mixture on each chicken breast. Broil 1 minute. Remove chicken from oven and turn over, brush chicken with remaining honey mixture. Broil 1 additional minute until chicken is done.

Plate, serve and enjoy.


We both loved this chicken it was like almost a barbecue sauce with the sweetness from the honey-vinegar and the spiciness from the chili powder and the pepper flakes. Try it either our way or the original (obviously the garlic was taken out, but it did not lack any flavor without it.) Its good!

Sunday, April 6, 2008

Land Ahoy! One Eyed Sailor

I admit it, if I could I would watch food network all day every day, I would. So well as you can see I watch a lot of food network, and yesterday Paula Dean was making some breakfast/brunch dishes. She made one she called a one eyed sailor and I thought that would be the perfect Sunday morning breakfast for Ben, something new, fun and it looked so good when Paula made it. I made a few changes, because she made a cheese sauce to go with the one eyed sailors, and I thought that was just too much work for a Sunday morning. You can find her original recipe here.


So a one eyed sailor is a piece of bread with the center cut out, and an egg in the middle. Simple, but it looks extravagant and is soooo good.

One Eyed Sailor

2 eggs
2 pieces thick toast
pinch of salt
pinch of pepper
pinch of chyanne pepper
1 1/2 tbsp butter
1/8 cup sharp cheddar cheese

You will also need medium sized cookie cutter, just big enough for an egg to sit in the middle of the bread. I used a frog, but I would recommend using a shape that doesn't have too many sharp edges. This will allow for the egg to sit better in the toast.


First cut out the centers of your bread. Then place butter in sautee pan and let melt, over medium heat add the spices to the butter and just stir to combine just so that the spices are even in the pan. Place bread with middle cut out in pan and crack egg into the middle, let sit, DO NOT MOVE, TOUCH, ANYTHING. Just let the egg and bread hang out until the egg is starting to cook and bread will be perfectly toasted, maybe 3 or 4 minutes on the first side. Then flip! The second side will take less time maybe 1 to 2 minutes, and then you have a one eye sailor. I then grated some sharp cheddar cheese on top before taking them out of the pan so it could melt into the top of the one eyed sailor.


Ben said "Tied for favorite with everything else." But he also said that if he had to only order one thing in a restaurant it would be this.

I also just grated up a Yukon gold potato and put it in a pan with a small yellow onion and let everything cook out until brown (a simple hash) to go with these one eyed sailors.

Wednesday, April 2, 2008

Cod the Way You Want it

I want fish. Now if you knew me this statement may be surprising. I used to hate fish for about the first 22 years of life. But in the last few months I've learned to like, no actually maybe love fish. At first I said, good, but I'm not sure I'll ever want it, like crave it and order it or make it for myself. But this has all of the sudden changes. I love fish and I want it. So we made some for dinner. Ben and I like different spices and tastes, so usually making two separate recipes is impossible, but putting different spices on to the pieces of cod and placing them both in a pan with some oil, lemon and white wine, made this very possible.


Cod
3/4 lbs Cod
1 Tbsp olive oil
1 Lemon
1/4 cup White Wine

(mine)
1/4 tsp Salt
1/4 tsp Pepper
Sprinkling Re Pepper Flakes

(Bens)
1/4 tsp Salt
1/4 tsp Pepper
1/2 tsp mixed Italian seasonings (Rosemary, Thyme, Garlic, etc.)
1/2 the Zest of a Lemon


In a sautee pan heat oil on medium low, while heating season the cod (to your liking) place in pan (non seasoned side down) add in wine and squeeze the juice of half of your lemon on top. Let fish cook until the top has turned white and flakes, which means that the fish has cooked. The majority of the wine, and lemon liquid will have evaporated.


We had the fish with a side of lemon roasted asparagus and broccoli. Good, healthy, simple and cod just the way you like it.